|
|
 |
|
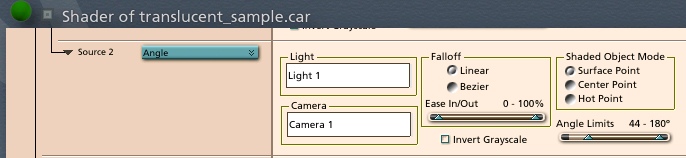
Light text box This is where you enter the name of the light you want to affect your shader. Doesnt HAVE to be a light, can be any object. Camera text box This is where you enter the name of the camera you want to affect your shader. Doesnt HAVE to be a camera, can be any object. Falloff box Linear or Bezier radio button- determines how the transition between the angles is treated. Ease In/Out slider- allows the bezier curve to be adjusted. (sorry, no preview) Invert Grayscale checkbox Flips the grayscale output Angle Limits slider Allows you to define a range of angles that you want to be affected. Any angles between the numbers set by the tabs will be white. Shaded Object Mode radio buttons These buttons determine which part of the shaded object is checked for the angle calculation: Surface Point- each point is checked individually. This means that the object could be partially affected. Center Point- the center of the object controls the shading for the whole object. A single value will be returned for the entire object. Hot Point- same as center, but the user can move the hotpoint to gain more control.
|
|
[Shoestring Graphics] [Shoestring Shaders] [Details] [Samples] [Download] [Shoestring Toolbox] [Gallery] [Links] [Privacy & Contact] [Tutorials] [Other Stuff] |